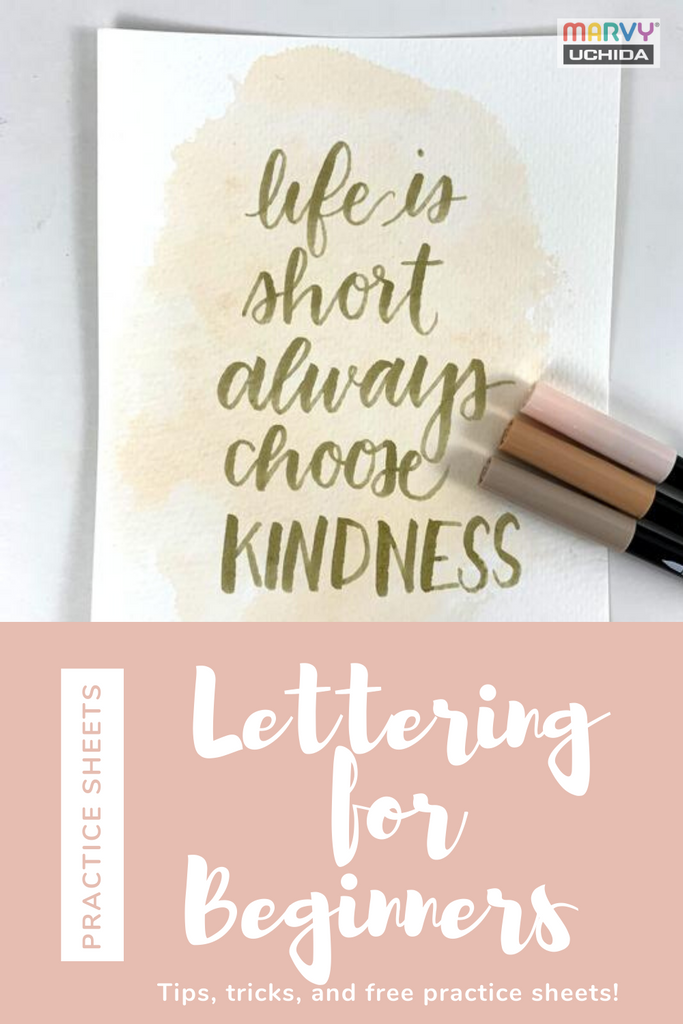
Lettering for Beginners: Free Hand Lettering Practice Sheets
Have you ever heard the phrase “Practice makes progress?” Well, learn to love it because that’s the motto for getting great at hand lettering!
It doesn’t matter if you’ve been working on your hand lettering alphabet for weeks or months, the simple truth is that the only way to get better fast is to practice, practice, practice. Developing your skills will take time and experience. Of course, we all wish we could look at a ton of cute lettering styles, go to bed, and wake up with amazing new skills. Unfortunately, that’s not how it works. So to get better at lettering, you’ll need to letter!
Luckily, we have some tips, tools, and practice sheets to help you learn to love practicing your lettering. First up are your tools.
The tools you’ll need to start hand lettering are pretty simple: paper, pencil, markers, and a ruler. The best part (and what makes lettering such a fun hobby) is that you can work on lettering pretty much anywhere as long as you have a writing instrument and something to write on. Of course, as you develop your skills you’ll learn which pens and markers work best for you. To start, we wanted to share some of our favorite beginner tools that will help you develop your perfect lettering alphabet.
Hand Lettering Tools
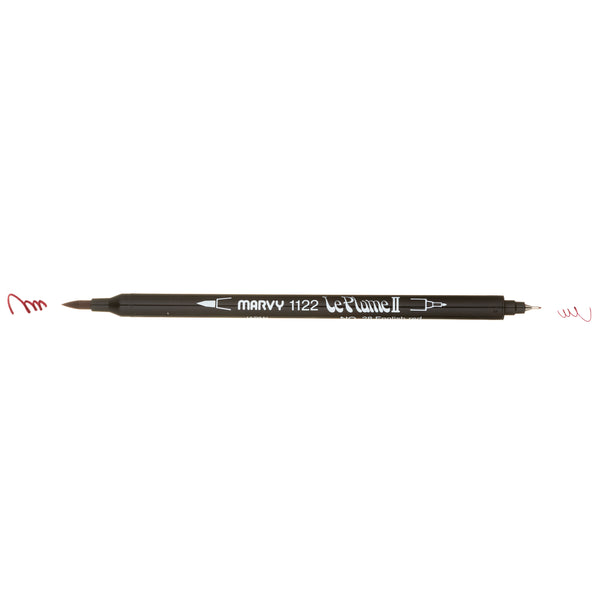
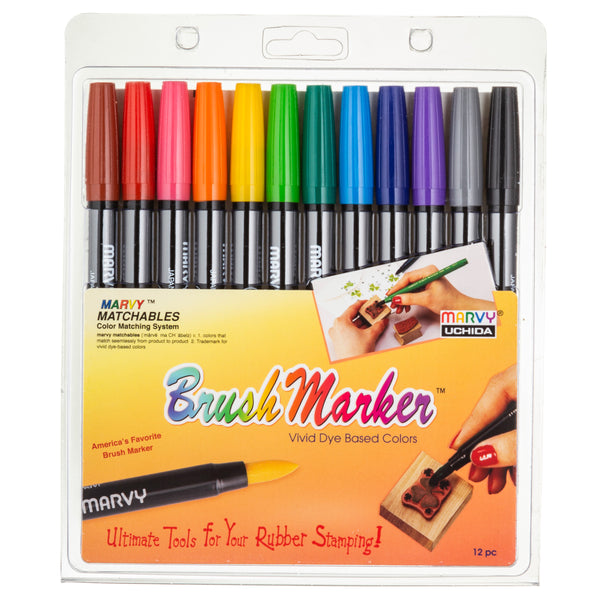
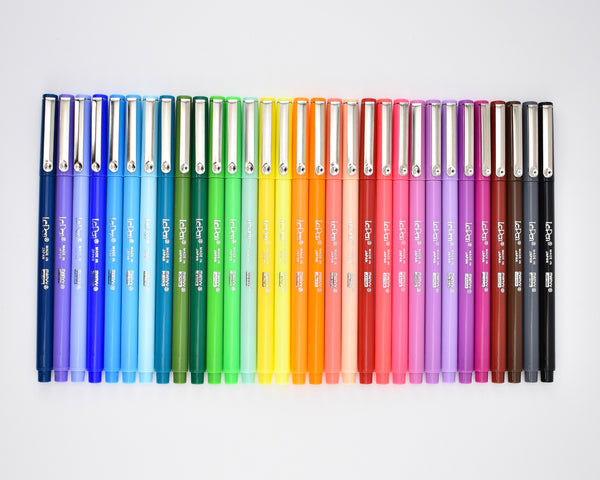
Le Plume II
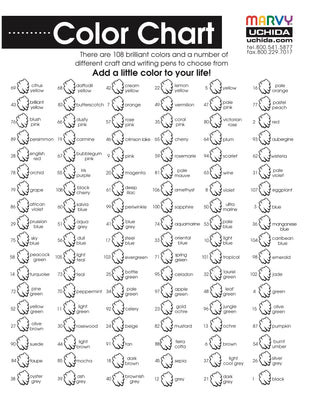
Our favorite pen for lettering has to be Le Plume II. It’s a dual-tip marker with a flexible brush tip on one end for all your hand lettering and brush calligraphy projects and a fine LePen tip on the other side for detail work or creating tiny faux lettering. These markers come in 108 colors so there’s definitely one that’s perfect for your next project.
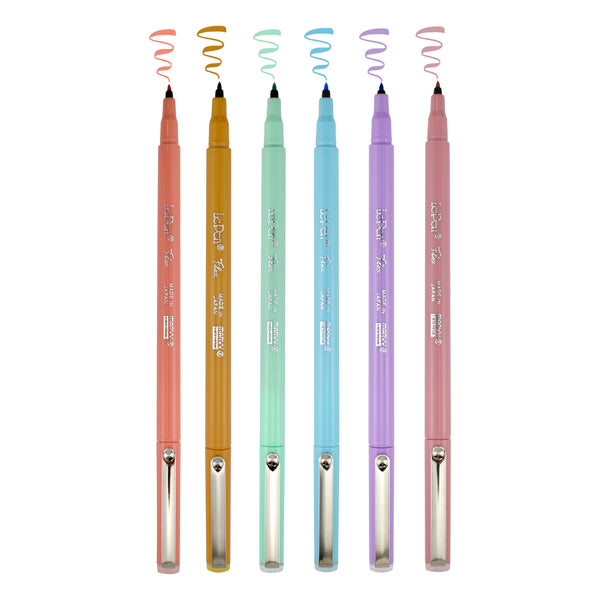
Le Pen Flex
New to the Uchida family, Le Pen Flex has taken the lettering world by storm! This is definitely our favorite hand lettering tool for practicing on a small scale. The tiny flexible tip on these pens makes them perfect for adding details or working on small hand lettering fonts. If you love bullet journaling, these make a great addition to your toolkit for writing out headers and reminders.
LePen
LePen has been a journaling and planner staple forever, but it’s also becoming a go-to tool for lettering enthusiasts for fine detail work and small faux-lettering! This is the same tip that comes on Le Plume II.
Pencil
Pencils are great to have for tracing from lettering sheets to give yourself more practice room, outlining your designs before you commit to the marker, and lightly sketching ideas. As you develop your style and lettering alphabet, you probably won’t reach for the pencil that often but in the beginning, it will be your best friend. There’s nothing worse than lettering blind on a surface you love and can’t replace!
Paper
As you work on your lettering, you’ll discover which types of paper and markers work best for your specific style, but for now, keep it simple! In the beginning, you can start by using regular, old copy paper. Yep, that’s right. The kind that goes into your printer. It’s smooth enough to easily use with most pens and markers but also cheap enough that it’s ok to make mistakes and start over.
You might also want to invest in some tracing paper. You can use tracing paper over your practice lettering sheets to make them last longer. You can also use it to draw extra elements like banners or swooshes and see if you like how that looks with your project. Hate it? Remove the tracing paper! It’s almost like having layers in a digital art tool.
Of course, your best bet will be to grab a notebook of marker paper. Yes, there is paper made specifically for markers. Because markers have nibs or tips that can sometimes be rough, this paper makes sure your tools glide smoothly.
Your ultimate hand lettering toolkit can be as big or small as you need. The main goal is to use the art tools that will help you create!
Hand Lettering Basics for Beginners
When you start lettering, the first thing you learn is the basic strokes. Starting with simple downstrokes is the way to learn how to control the weight of your lines. The downward strokes should be heavier than upward strokes. Depending on the type of marker or pen you are using, this may take a bit of practice. That’s why starting with simply repeating downward and then upward strokes, is the best way to begin.
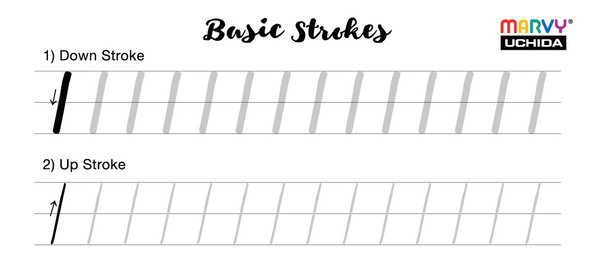
To create the downward strokes, you will need to apply more pressure with your brush marker. For upward strokes, you will lift the marker so that only the tip is touching the pen to create thinner lines. If you are using a pen or marker without a brush tip, you can fake your calligraphy letters by writing the words and then thickening the downward lines afterward. Whatever type of marker you are using, you always want to make sure that your elbow is on the table. That really helps keep your hand stable which creates smoother strokes.
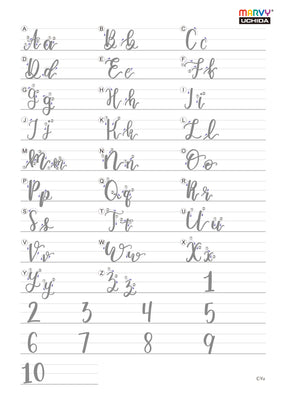
Practice Sheets
Now it’s time to use those tools and practice! The best and easiest way to get started is to use some hand lettering practice sheets.

These sheets are perfect lettering tools for beginners because they will help you get used to how the marker you’re using moves, how to create thick and thin lines with it, and how to connect different strokes for the perfect letter. It may feel redundant or boring to practice a downstroke vs an upstroke over and over again, but remember that you had to do the same thing in kindergarten when you were first learning how to write. It’s also this practice that will show you what styles you like and don’t like.
We have a whole collection of hand lettering practice sheets and guides to get you started!
Basic Tips
If you’re still unsure, try these tips:
- Start with a pencil and a good eraser! Being able to trace and design without worrying about the final product being perfect will free your mind and let you focus on mastering your skill.
- Find some quotes or words you love! Pull together a few words that you’d like to get good at lettering and focus on working on those. Starting a brand new phrase every single time when you’re first learning will make it hard to see and celebrate your progress!
- Sketch! Use your pencil to layout ideas, space out your lettering, and plan out your project. Once it looks exactly how you want, you can trace it over in pen before filling in the lettering.
Most importantly, have fun! Working on hand lettering and brush calligraphy is supposed to be a calming and creative hobby. Don’t stress so much about it being perfect, you’ll get there. For now, enjoy the ride!